Showing posts with label SNG. Show all posts

Wednesday, 3 June 2015

SNG - Nuts about you ....

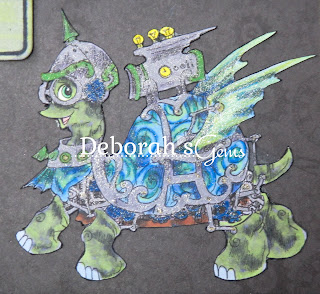
...  Good morning!  It's my turn to showcase one of Rick St Dennis's fabulous digital images on Sparkle and Glitter.  You all know that I'm rather fond of Rick's turtle images, and I had such fun yesterday evening colouring the Steampunk Turtle, here's my card:

Nuts about You - photo by Deborah Frings - Deborah's Gems

Stamps: Rick St Dennis Digi - Steampunk Turtle
Accessories: White Lustre Card; Kanban DP - Alchemy; Copic Markers; Wink of Stella - Clear, Silver; Memento Marker - Black

I printed the turtle on white card and coloured him with Copic markers.  I cut him out with a scalpel and ran a black marker around the image to get rid of any white edges.  Once cut out I added lots of sparkle using my silver and clear Wink of Stella brushes.  I used silver on the metal frame around his shell and clear over his shell and wings.  I covered the card with some steampunk themed paper that I've had in my stash for years!  I finished the front with a fun sentiment "I'm nuts about you!" - seem appropriate as he's held together with lots of nuts!    I coloured the sentiment bubble with grey and lime green to match his wings.  The sentiment was produced on my computer.  The inside has a mat layer of the design paper and a white panel on which to write my message.  I've also taken a close-up photo of the turtle showing all the lovely sparkle - it really helps that it's sunny now!

Nuts About You Detail - photo by Deborah Frings - Deborah's GemsNuts About You inside - photo by Deborah Frings - Deborah's Gems

Sorry I've been missing for a few days - I've been busy with various crafty things.  On Sunday I went to the second meeting of the Scrappy Chic Kitchen Roll Sprayers.  Most of us attended classes with Dyan Reaveley when she was over at the beginning of March and we wanted to continue to meet, learn new techniques and work on our journals.  It was such fun and I got really inky!

Yesterday was my birthday - so I got to go shopping - it was fab!  In the evening Jonathan and  Kathryn took me out to dinner at my favourite restaurant - Mitchell's Fish Market in Northville.  It was absolutely delicious and the perfect end to a lovely day.

I had so many wonderful birthday wishes on my Facebook page from and I'd like to thank everyone who took the time to write a message - they are all very much appreciated, thank you.  And that's all for now.  See you soon.

signature

Sunday, 24 May 2015

SNG - Sending hugs ....

.....  Good morning!  It's my turn to showcase one of Rick St Dennis's fabulous images today on Sparkle and Glitter.  I think you all know that I really like Rick's wonderful Hat Ladies, so here's another in the series:

Sending Hugs - photo by Deborah Frings - Deborah's Gems

Stamps: Rick St Dennis Digi - May Lily of the Valley; Winnie & Walter - The Big, The Bold & Friends, Sparkle
Inks: Stampin' Up! - Real Red; Versafine - Onyx Black
Dies: Spellbinders - Labels 25 (S5-077) #4
Accessories: White Lustre Card; SU Card - Bermuda Bay; SU DP - Real Red; Copic Markers; Wink of Stella - Clear


The challenge at Just Us Girls - JUGS#294 is a photo inspiration and I've taken the colours of red, aqua and white from the photo.  I coloured the image with Copic markers, added some Wink of Stella sparkle to her eyeshadow and the little flowers.  I know that the flowers in this image are lily of the valley, but I decided to make them redbells!!  I used an elegant die to cut out the image.  I cut a mat layer of dark aqua card, layered on some red design paper and adhered the image flat and towards the top of the card.  I finished the front with a bold and simple sentiment.  On the inside I cut another mat layer of aqua card and added a simple greeting on the white panel.

Sending Hugs inside - photo by Deborah Frings - Deborah's GemsSending Hugs sq - photo by Deborah Frings - Deborah's Gems

I do like Rick's lovely ladies - you can this image and many, many more at Rick's Zibbet shop.  That's all for now, see you soon.

signature

Wednesday, 25 March 2015

SNG - Life is a Carnival ....

....  Morning!  It's rather dull, grey and wet here this morning - very miserable outside, but we need the rain!  I was going through various challenges that get posted this morning and I suddenly realised that I hadn't done my post for today.  This morning's card is bold, bright and lots of fun - a complete contrast to the dull grey outside my window:

Carnival - photo by Deborah Frings - Deborah's Gems

Stamps: Rick St Dennis Digi - Euro Clown TrOuPe; The Craft's Meow - Life is a Carnival
Inks: Memento - Tuxedo Black, Grey Flannel
Dies: Die-namics - In & Out Diagonal Stitched Rectangles #3
Accessories: White Lustre Card; Stampin' Up! Card - Strawberry Slush; Cosmo Cricket - Delovely; Copic Markers; Wink of Stella - Clear


Rick has a wonderful collection of Euro style images, and I absolutely love this image of Euro Clowns.  I think they look a bit startled and a bit wide eyed, but they are really fun to colour.  You can find this image, and many more, at Rick's Zibbet and Esty shops.  I printed the image twice as I wanted to create a little depth by layering the two smaller clowns.  I used Copic markers to colour, cut the images out with a scalpel and then adhered the two smaller guys on top!  There's only a bit of dimension, but it's enough.  I added lots of sparkle to the image with my Wink of Stella brush - and you can actually see it in the photo.  I used the layout from this week's Retro Sketches - RS#157 challenge.  I found this wonderful rainbow striped paper (reminds me of barcodes) in my stash and used it to cover the card.  I die cut a panel of white card with my new die (love the diagonal stitched effect), adhered it to the card and then added my clown troupe.  I finished the front with this fun, bold sentiment - seemed entirely appropriate.  On the inside I cut a mat layer of bright pink card and on the white panel stamped another carnival image and sentiment - lots of space for a message too.

Carnival inside - photo by Deborah Frings - Deborah's GemsCarnival sq - photo by Deborah Frings - Deborah's Gems

I told you yesterday that I'd had my hair cut.  Well Jonathan got home last night - he'd not had any advance warning that this was happening - we hugged, kissed, chatted and generally caught up with how his day had gone.  I was smiling at him and just said "So?"  Jonathan's face was a picture, he says "You've had your hair cut?", and yes, it was a question.  I think I could have gone for green hair and he still wouldn't notice!!  Love him very much.  That's all for now - I think I'm going into my craft room, certainly not venturing outside today - it's absolutely pouring!!!  See you soon.

Edited to add:  If you're a fan of Rick's work I thought I'd let you know that we have a DT Call on at the moment.  We are looking for a number of enthusiastic and creative folk to promote Rick's art on Facebook.  Full details can be found here.

signature

Thursday, 19 March 2015

SNG - Frida Kahlo ...

.....  Hello again!!!  I do hope you liked my Zombie Lady card!  I'm back with another card for this week's Inkspirational Challenge - INK#78.  The theme at the challenge is to create a She Art project or simply to use a woman's image.  Here's my card:

Frida - photo by Deborah Frings - Deborah's Gems

Stamps: Randi Dandi Tribute - Frida; Dylusions - Laugh Til You Leak, The Write Words
Inks: Stampin' Up! - Rich Razzleberry
Dies: Lil Inkers - Stitched Rectangles # 4
Accessories: White Lustre Card; Kaisercraft DP - Violet Crush; Copic Markers; Wink of Stella - Clear


Don't you love the image? It's called Frida and is drawn by Rick St Dennis, exclusively for I Brake for Stamps.  It's part of Rick's Randi Dandi Tribute series, you can also get rubber stamps designed by Rick at I Brake for Stamps.  I printed the image on white card, cut it out with a die and then coloured with Copic Markers.  I've used the colours from this week's Colour Throwdown - CTD#334 as they are just perfect for Frida.  I added just a touch of sparkle to her gems.  I was a bit nervous colouring this image, so I looked up pictures of Frida Kahlo (see below) on the Internet and used them as a guide - such a beautiful woman.  I covered the card with some floral paper to match the colours on the image and adhered the image.  The words come from one of my Dylusions set - seemed absolutely appropriate for an artist.  On the inside of the card I cut a mat layer in design paper and stamped a greeting on the white panel.

Frida inside - photo by Deborah Frings - Deborah's GemsFrida sq - photo by Deborah Frings - Deborah's Gems

There is a Diego Rivera and Frida Kahlo exhibition on at the Detroit Institute of Arts from now until 12th July, and it was watching the adverts on TV that gave me the idea of making a card with this image.  We'll be visiting the exhibition in the not too distant future.

photo credit

photo credit

photo credit

The photos above were taken by Nickolas Murray, who had a 10 year relationship with Frida.  I think the images are absolutely fabulous.  That's all for today - see you soon.

signature

Thursday, 12 March 2015

SNG - Hello .....

....  Good morning!  I am so enjoying all the warm (relatively) temperatures and the grass reappearing - it is definitely spring!  Today I've got a fresh, spring-like card with a slightly quirky take!!

Hello - photo by Deborah Frings - Deborah's Gems

Stamps: Rick St Dennis Digi - Steampunk Rose Bug; Kaisercraft - Shine Bright
Inks: Stampin' Up! - Wild Wasabi, Wisteria Wonder
Dies: Spellbinders - Petit Ovals Sm (S4-140) #4; Die-namics - Jumbo Fishtail Banner Stax #3
Accessories: White Lustre Card; SU Card - Wild Wasabi; Kaisercraft DP - Violet Crush; Copic Markers; Wink of Stella - Clear


I really like the Steampunk genre and when I saw Rick's new Steampunk Rose Bug image I knew I had to play with it - you can find it and many other Steampunk themed images at Rick's Zibbet and Esty shops.  I coloured the image with Copic markers, cut it out with an oval die and then added some sparkle to the bug, the flower and the gem.  I edged the cut image with a purple marker.  The colours are from Colour Throwdown - CTD#333 and the layout is based on the sketch at Freshly Made Sketches - FMS#177.  I used a couple of sheets of design paper and some green card to cover the card base and added the image and sentiment banner on top.  On the inside I cut some more of the design paper and added a panel of white card for my message.

Hello inside - photo by Deborah Frings - Deborah's GemsHello sq - photo by Deborah Frings - Deborah's Gems

The photo doesn't really capture all the shimmer and sparkle on the image, so I took a close-up, slightly out of focus, to really show the bling!!

Hello detail - photo by Deborah Frings - Deborah's Gems

I really do like this image and one of the great things about digital images is that you can resize them.  I think I'm going to print this one again, but much bigger - I'll share that with you soon.  Have a great day.

signature

Friday, 6 March 2015

SNG - Happy Birthday .....

... Morning!   I've got a fun birthday card for you today - suitable for a little boy or even a big boy, who is still young at heart!!

Happy Birthday - photo by Deborah Frings - Deborah's Gems

Stamps: Rick St Dennis Digi - Buddy and his Pet Plant; Uniko Studio - Simply Said Birthday, Classic Numbers
Inks: Versafine - Onyx Black; Stampin' Up! - Lucky Limeade
Dies: Lil Inkers - Stitched Stars
Accessories: White Lustre Card; Papermania DP - For Him; Copic Markers; Wink of Stella - Clear; SU Marker - Basic Black


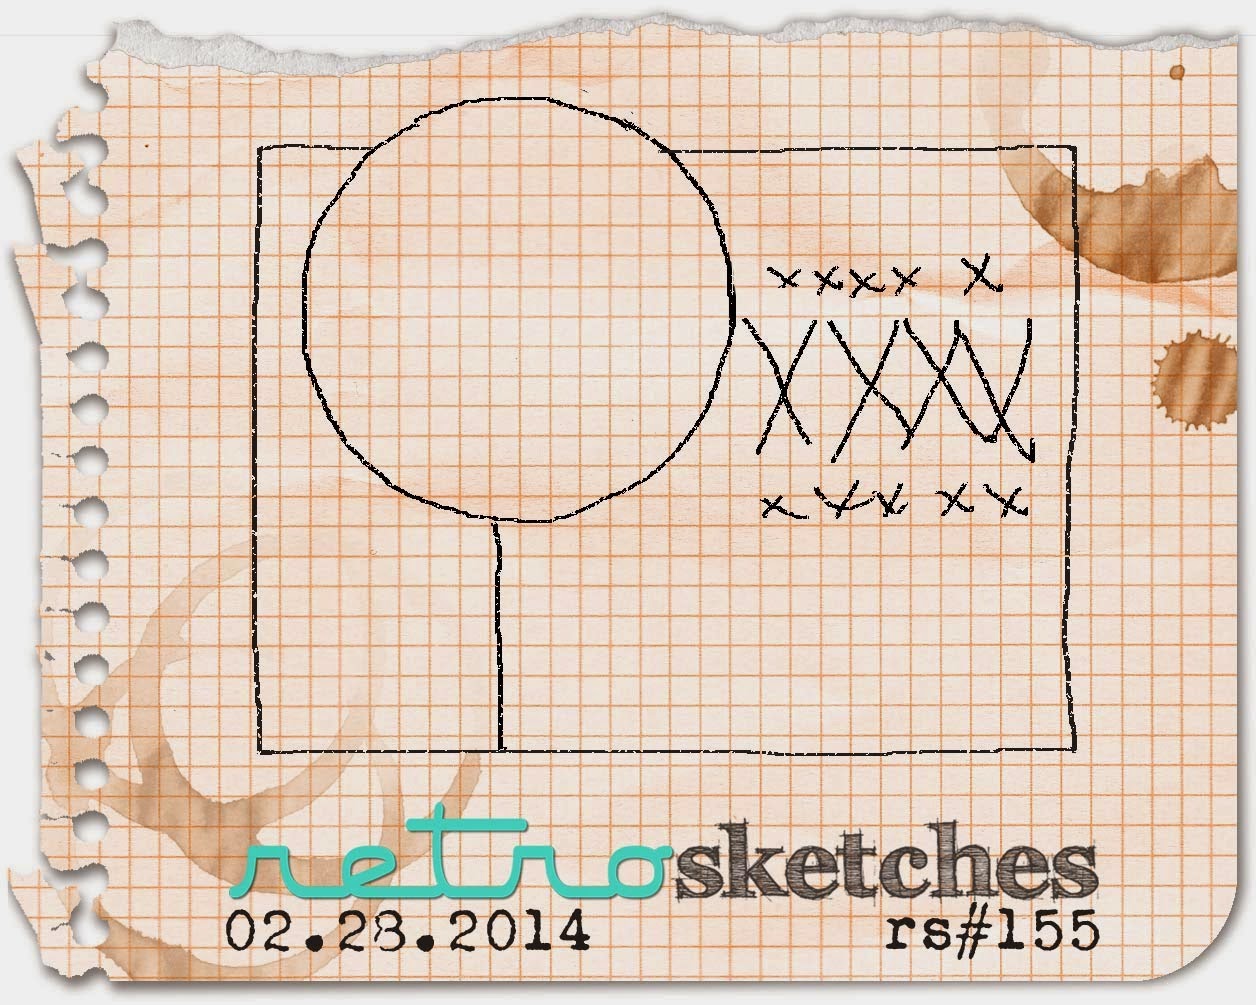
Don't you think Buddy and his Pet Plant are adorable?  You can find him and many more super fun digital images over at Rick's Zibbet and Esty shops.  I used the layout from this week's Retro Sketches challenge - RS#155, and the colours are from the current My Favourite Things Colour Challenge - MFTCC#16.  I used a couple of sheets of design paper to cover the card base.  I printed Buddy on some white card, coloured him with Copic markers, cut him out and edged the image with black marker.  I die cut the star from white card, coloured it with Copic markers and added lots of sparkle with my Wink of Stella brush.  I added a touch of sparkle to the pet plant too!  I finished the front with a simple birthday sentiment.  On the inside I cut a mat from the design paper and added a simple greeting on the white panel.

Happy Birthday Sq - photo by Deborah Frings - Deborah's GemsHappy Birthday inside - photo by Deborah Frings - Deborah's Gems

I hope the DT over at MFT are okay with my colours - when I printed off the challenge graphic I thought the colours were blue and green, it's only now that I realise the colour is lavender!!  Never mind - I'm pleased how this turned out.

We've got sunshine again, but along with the sun comes cold, cold temperatures!  But spring is on the way - the clocks go forward this weekend and the weatherman is promising much warmer temps next week - yea!!!  I was out yesterday and I spotted some grass - albeit slightly brown, but it'll green up soon - I hope.  That's all for now.  See you soon.

signature

Thursday, 22 January 2015

SNG - Hat Lady ...

...  Good morning all!  I'm running a bit late with this post - should have been up a few hours ago, but I completely lost track of the days!  Anyhow, here's a card that I made using one of Rick St Dennis's wonderful Hat Lady images.  The ladies are so glamorous; I've made a couple of Hat Lady cards before here and here.  Here's today's card:

Hello - photo by Deborah Frings - Deborah's Gems

Stamps: Rick St Dennis Digi - 1960 Couture Hat; Winnie & Walter - The Big, The Bold & The Happy, The Big, The Bold & Extras
Inks: Memento - Tuxedo Black, London Fog; Stampin' Up! - Melon Mambo
Dies: Spellbinders - Petit Ovals Lg (S4-138) #5, Petit Ovals Scalloped Lg (S4-139) #5
Accessories: White Lustre Card; Teresa Collins DP - Far and Away; SU Card - Melon Mambo; Copic Markers; Wink of Stella - Clear

The one good thing about running late with today's card, is that I got inspiration for the layout from this week's Freshly Made Sketches challenge - FMS#170.  It's a super sketch and can be ultra clean and simple, or a bit more dressed up like my card.  Like many of us, I have lots of design papers which I've been keeping safe in my stash.  One of this year's resolution is to USE the papers that I've got.

I printed the digi on white card, coloured her with Copic markers and added some sparkle to her gems with a clear Wink of Stella brush.  I cut the image out with an oval die and adhered it to a pink mat layer.  I found this elegant damask style paper and thought it would be the perfect backing.  I added a simple greeting to the front.  On the inside of the card, I cut a mat layer of pink card and on the white panel added some roses.

Hello inside - photo by Deborah Frings - Deborah's GemsHello sq - photo by Deborah Frings - Deborah's Gems

Rick is a fabulous artist and his digi images are a joy to colour.  If you want to see more of his Hat Lady collection check out Rick's Esty and Zibbet shops.  Before I go here are all the cards I've made - looks like I've got a theme going!!

Happy Birthday - photo by Deborah Frings - Deborah's GemsHappy Birthday - photo by Deborah Frings - Deborah's GemsHello - photo by Deborah Frings - Deborah's Gems


Bye for now!

signature

Monday, 12 January 2015

SNG - Turtle Art ....

....  Good morning!  I think many of you know that I like the turtle images drawn by Rick St Dennis and I've got another to share with you this morning.  This is a fun guy - he likes to get inky and messy - a bit like most of us!!

Artemis Turtle - photo by Deborah Frings - Deborah's Gems

Stamps: Rick St Dennis Digi - Artemis The Sunday Painter; Stampin' Up! - Work of Art; Stamp free with Stamp Crafter
Inks: SU - Strawberry Slush, Bermuda Bay, Tempting Turquoise, Wild Wisteria; Versafine - Onyx Black
Dies: Spellbinders - Squares Lg (S4-126) #7, Lacey Squares (S4-295) #5
Accessories: White Lustre Card; Copic Markers; Sakura Glaze Pen

I printed Artemis on white card and coloured him with Copic markers and Sakura Glaze pens; if you like him you can find him on Rick's Zibbet shop where you can check out even more of Rick's images.  I cut out the finished image with a square die.  I coloured some white card to match the turtle's body and die cut the lacy square for a mat layer.  I added splodges of colour to the corners of the card and stamped on words that seemed absolutely perfect.  The words come from a stamp that I got free with the Stamp Crafter several years ago.  On the inside of the card I stamped the colours again and finished a fun sentiment.

Artemis Turtle - photo by Deborah Frings - Deborah's Gems

I've got a bit of a dull day planned today - I've got to call several different medical insurance companies to sort out some bills - I can't think of a duller way to spend the day!  But it has to be done.  I do hope you have a better day.  Take care - see you tomorrow!

signature

Tuesday, 9 December 2014

SNG - Jingle Bells ...

... Hello again!  I'm still busy working on Christmas cards for this year - I'm almost finished, but I think it's better to have too many, than not enough!!  This one is cute with an edge of grunge!

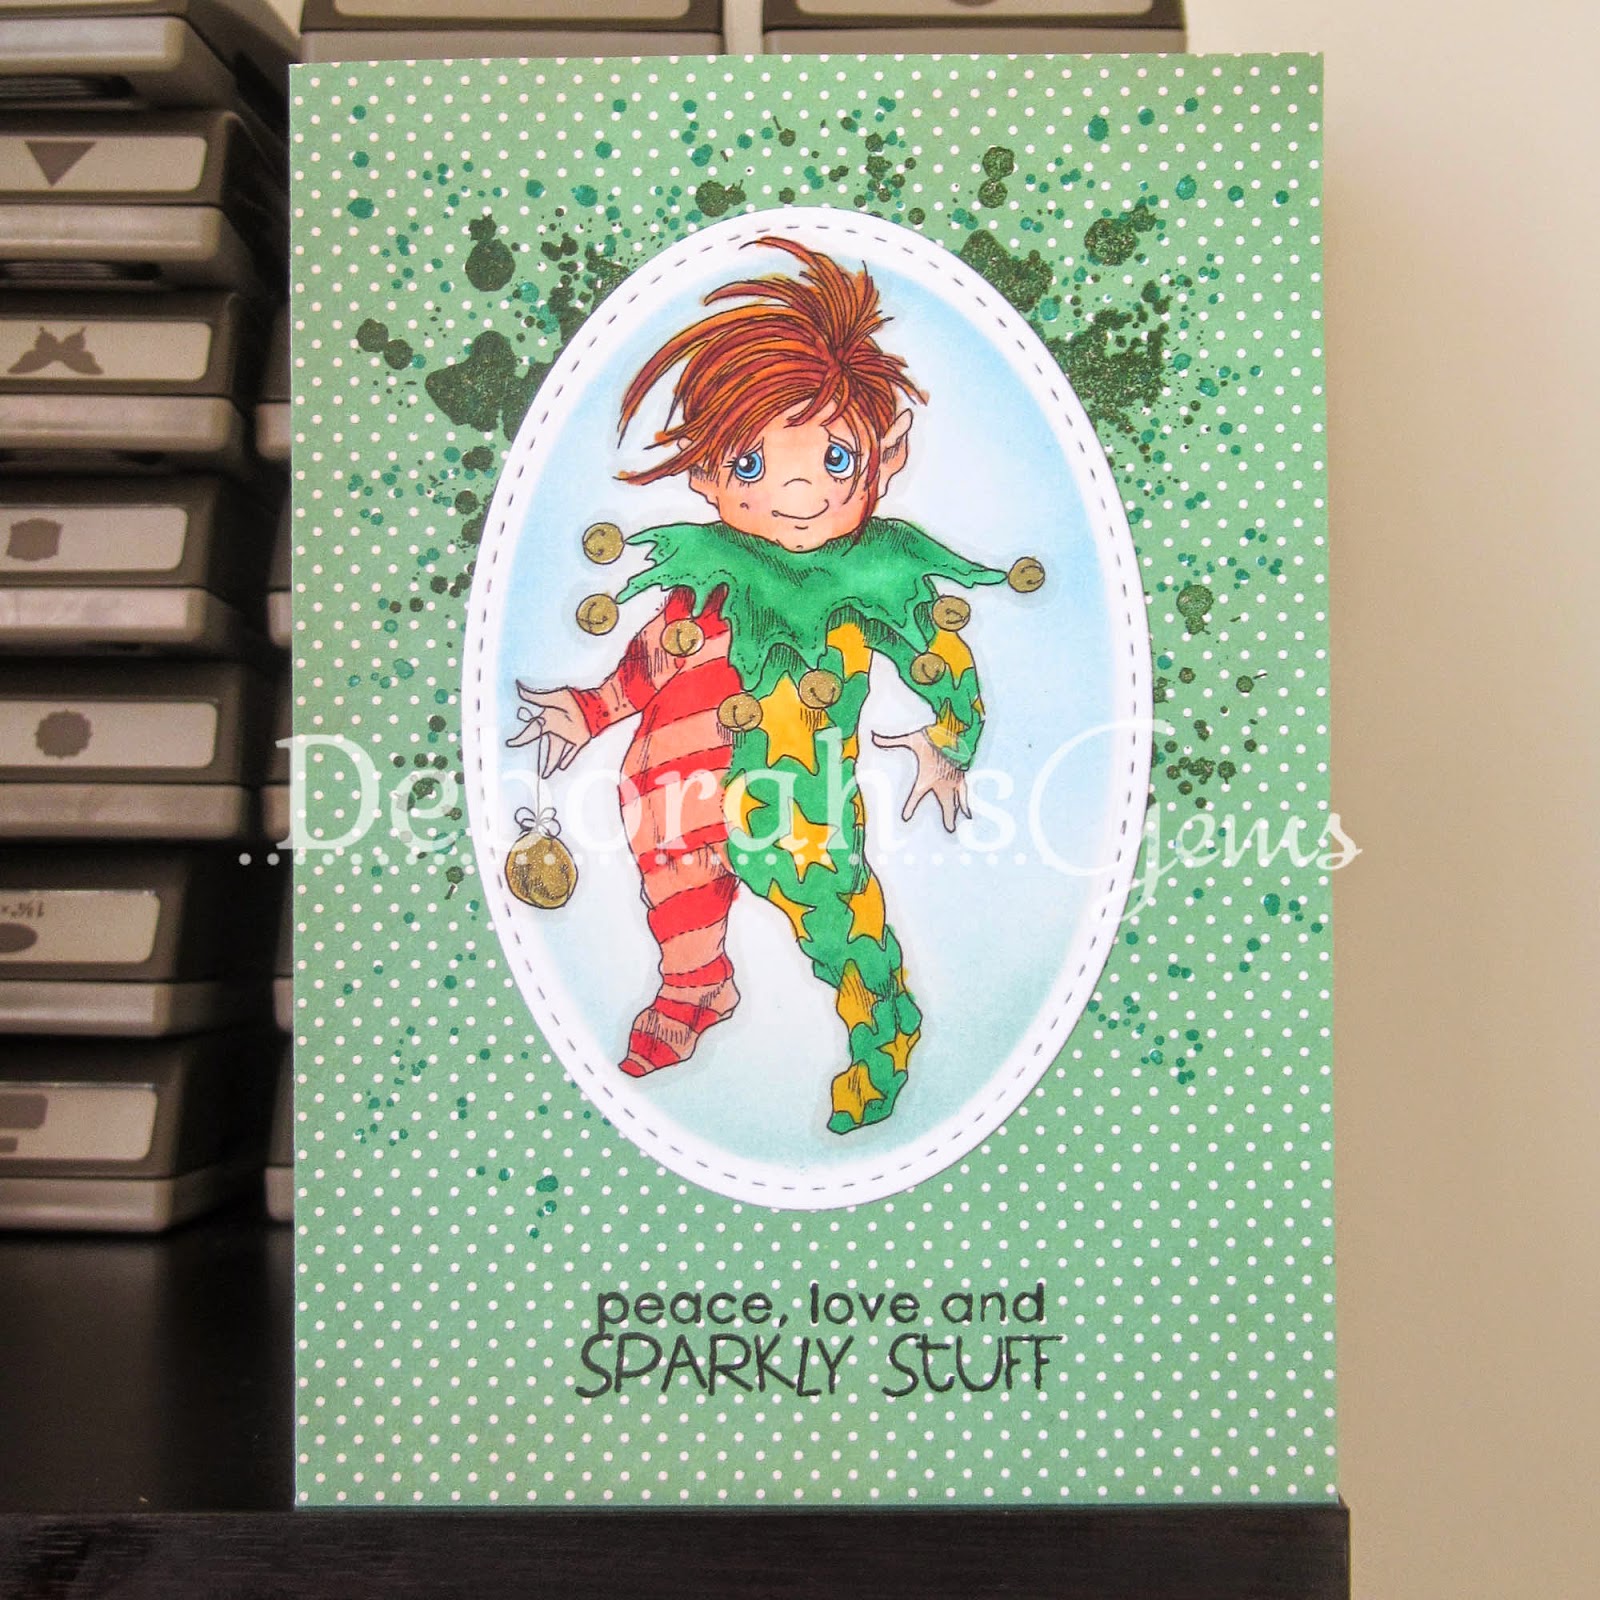
Sparkly Stuff - photo by Deborah Frings - Deborah's Gems

Stamps: Rick St Dennis Digis - Billy Goldenbells; Reverse Confetti - Tinsel 'n' Trim; Stampin' Up! - Gorgeous Grunge
Inks: Distress - Evergreen Bough, Tumbled Glass; SU - Mossy Meadow, Glorious Green; Versafine - Onyx Black
Dies: Lil Inkers - Stitched Ovals - #4
Accessories: White Lustre Card; Kaisercraft DP - Gingerbread; Copic Markers; Wink of Stella - Gold


I used a couple of challenges in the making of this card.  I used the sketch from Freshly Made Sketches - FMS#165 for the layout (I kept, mostly, to the sketch), and I used the theme from Addicted to CAS - ATCAS#53 - where the cue word is DOTS.  I got this cute little guy from Rick's Zibbet shop.  I printed him on white card, coloured with Copic markers, cut out with a die and then while in the die I shaded in some grass and a sky.  I covered the card base with this fab dotty paper and added some grungy splatters before adhering the die cut image.  I finished the front with a fun sentiment.  On the inside I cut a mat in the same design paper and kept the greeting really simple - and totally appropriate too!

Sparkly Stuff inside - photo by Deborah Frings - Deborah's GemsSparkly Stuff sq - photo by Deborah Frings - Deborah's Gems

That's all for now.  Take care and see you soon.

signature
Related Posts Plugin for WordPress, Blogger...