Showing posts with label C&9 - Make Some Noise. Show all posts

Friday, 25 November 2022

SHC - Birthday Cards for my Great Nephew

.... Morning. It's time for my Seven Hills Craft blog post. This week I've got a couple of birthday cards to share. My great-nephew, Nico-Lewis, will be 6 years old in December and I decided to make his cards early and get them in the post - hopefully they'll arrive on time and beat the postal strike!! Here's the first card:


Stamps: Concord & 9th - Make Some Noise, Yay for Birthdays
Inks: Gina K - Bubblegum Pink, Lipstick, Tangerine Twist, Wild Dandelion, Lucky Clover, Ocean Mist, Blue Raspberry, Wild Wisteria, Dark Lilac; Versafine Clair - Nocturne
Dies: C&9 - Make Some Noise
Accessories: White Card; Copic Markers


This was such fun to make. I used the Make Some Noise dies to cut all the pieces to make the noisemakers - I used white card for all the pieces. I coloured the pieces with Copic markers. I used the instructions on the back of the pack to assemble the noise makers. I used one of the greetings from the matching stamp set. This is a two-step image - with one of the stamps having the words 'happy, happy' directly above the letters - as I wanted to stamp each letter in a different colour, I carefully cut the 'happy, happy' words off the letters. I stamped the word 'birthday' in rainbow colours and then added a rainbow confetti border around the edge of an A2 notecard. I finished the front by adhering the two noisemakers to the card. Inside, I cut a piece of white card slightly smaller than the A2 notecard. On it I stamped a greeting in black and added some more rainbow confetti.


I made another card - this one will be going to Nico-Lewis from his Grand-Nanna:


Stamps: Concord & 9th - Out of this World, Yay for Birthdays; MFT - Bitty Birthday Wishes
Inks: Gina K - Wild Dandelion, Blue Lagoon, Key Lime, Medium Orchid; Versafine Clair - Nocturne
Dies: C&9 - Out of this World
Accessories: White Card; Silver Matte Card; Copic Markers; Clear Aqua Shimmer Brush

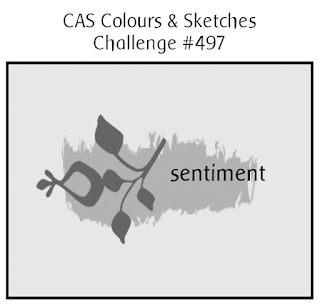
I'm submitting this card to CAS Colours & Sketches - CASC&S#497 where they have a sketch for us to use. I'm also playing along with Happy Little Stampers Birthday Challenge - HLSBC#11.


I cut a piece of card 5½" square, placed it on my stamping jig and stamped the starscape with four different inks. I trimmed the panel to fit on the front of an A2 notecard. Before adding the panel to the notecard, I stamped on a simple birthday greeting in black ink. I die cut the spaceship body from silver matte card and the other pieces from white card which I coloured with Copic markers. Once assembled, I added the spaceship to the notecard. I finished the front by adding a touch of sparkle to the windows and flames. Inside the card, I cut a mat layer of silver card. On the white panel I added a fun greeting a some stars.


I think these stamp and dies set are such fun - they make cards perfect for children, both boys and girls. But to be honest, I think they're going to work for my son Ben - he'll be 27 in January!!!

That's all from me today. Thanks so much for stopping by. See you again soon.

signature photo Signature.png

Wednesday, 27 April 2022

SHC - Geometric Quilt

....  Afternoon! I'm running late with my Seven Hills Craft blog post. I've been feeling very tired from my chemo, but this morning I woke full of energy, so decided to make a card for Jonathan's birthday:


Stamps: Concord & 9th - Make Some Noise
Inks: Memento - Paris Dusk, Canteloupe; Versamark
Dies: C&9 - Geometric Quilt Top Dies
Accessories: White, Navy, Grey & Gold Card; Gold Embossing Powder

I'm submitting this card to Color Throwdown - CTD#690 - totally inspired by the geometric cushion graphic. Also to Addicted to Stamps and More - ATSM#428 where the theme is birthday.


As soon as I saw the graphic on the the Color challenge I knew that I had to base my hubby's birthday card on it. I used my new Geometric Quilt top dies to cut a piece of white card - which has the whole pattern cut into it. I then used the diagonal and triangle dies to cut from navy, gold, grey, and white card stock. I spent sometime working out the pattern and then used liquid glue to adhere the pieces in place. I added the finished panel to the front of an A2 white note card. I finished the front by adding a simple birthday greeting in navy ink and gold embossing.


Inside the card, I cut a mat layer of navy card. On the white panel I stamped a fun birthday greeting in navy and soft gold ink.

That's all from me today. See you again soon.

signature photo Signature.png

Wednesday, 16 March 2022

SHC - Kids Cards

..... Morning! I'm here with my weekly post for Seven Hills Craft blog. Yesterday was my great-nephew's 10th birthday. I made a couple of cards for him - one from me and one from my mum. Here's the first card:


Stamps: Concord & 9th - Make Some Noise, Out of This World, All the Birthdays
Inks: Gina K - Electro Pop - Raging Red, Orange Glow, Blaring Blue, Screamin' Green, Hello Yellow; Versafine Clair - Nocturne; Hero Arts - Unicorn White
Dies: C&9 - Out of This World
Accessories: White & Black Card; Copic Markers; Nuvo - Clear & Midas Aqua Shimmer Brushes

I'm submitting this card to Never-Before-Used-Schtuff - NBUS#36 - two new sets from Concord & 9th, and also to Love to Craft Challenge Blog - LTCCB#67 where it's anything goes.


I stamped the two-step birthday greeting directly onto the note card using bright neon inks. It was reasonably easy to ink the letters are they are widely spaced. The focal image is CASED directly from the packing for the dies I used. I changed the starry background by stamping the stars on black card. I could have used my colour scraps, but I was lazy and just used white card which I coloured with Copic markers and then die cut. I adhered the starry background to the card and added the rocket and planet on top. I finished the front by stamping a few bright stars. Inside the card, I cut a mat layer of black card. On the white panel I stamped a bold red greeting and smaller birthday greeting in black ink, along with some more stars.


My next card uses Birthday Stacks - one of my favourite stamp and die sets:


Stamps: Concord & 9th - Birthday Stacks, All the Birthdays
Inks: Gina K - Red Hot, Wild Dandelion, Tangerine Twist, Lucky Clover, Bubblegum Pink, Blue Raspberry, Black Onyx
Dies: C&9 - Birthday Stacks
Accessories: White & Black Card; Felt Pens; Nuvo - Clear & Midas Aqua Shimmer Brushes


I started by cutting three piece of white card to the following measurements: 6¾" x 4¼" for the background layer, 5⅜" x 2½" for the candle layer, and 5⅜" x 1½" for the presents layer. I also cut a black layer at 5⅜" x 3" for the celebrate layer. Concord and 9th have an excellent video on their blog to show how to attach the layers. 

I stamped the balloons directly onto the background layer and used the solid circle to quickly add colour to the balloons, and then added some strings. I stamped the candles on the next layer, added colour and used the matching die to cut out the candles. I repeated this process for the presents. For the black layer I used the 'celebrate' die and cut out the word. All the dies cut little notches either side of the main images which is where you score the card. I added ¼" sticky tape to the tabs by the score lines and trimmed off the excess card. At this point I made sure all the layers were the correct depth and trimmed away any excess card. I added some extra detail with felt pens, and some sparkle to the candle flames and all the presents. On the back of the 3D card, I added a birthday greeting. I cut another of the background layers, used the shaped die to cut the curved dotted pattern, cut off the side pieces and trimmed the panel to be slightly smaller then the actual card. I stamped a greeting and added a balloon.


I took a photo looking down on the card so that you can see the 3D effect - it's a super card as it fits inside a standard A2 (US size) envelope.


You'll be seeing more cards featuring Birthday Stacks in next week's post - I made them earlier this week as I go for my first round of chemotherapy tomorrow afternoon. I'm not too worried about the actual process, but I'm not looking forward to the after effects - I'm a rubbish patient. I decided it would be a good idea to get ahead with my cards just in case I feel awful this coming weekend!!

That's all from me today - see you soon.

signature photo Signature.png
Related Posts Plugin for WordPress, Blogger...