Wednesday, 19 July 2023

Our Graduate

.... Hello again! The first of the special family events taking place this week is our daughter's graduation tomorrow at the University of Nottingham. We are so proud of Kat - she's graduating with a 2.1 in Politics and American Studies. Here's the card we are giving her (it's safe to share now, as Kat doesn't look at my blog):


Stamps: Gina K - Hats Off; Dare 2B Artzy - Wise Owl, Graduation
Inks: Archival - Forget-Me-Not, Vibrant Fuchsia; Versafine - Onyx Black; Versafine Clair - Nocture; Gina K - Stormy Sky
Dies: Gina K - Master Layouts 8; Hats Off
Accessories: White & Black Card; Clear Embossing Powder; Copic Markers


This is a large card measuring 5" x 7". I created the background panel by stamping the smaller mortar board image in blue and pink (the colours from the BA hood that Kat will be wearing). I used a die to cut out the panel and layered it onto a black mat panel and added it to the note card. I stamped the larger mortar board image in Versafine ink, embossed with clear powder and used the matching die to cut it out. I did the same for the scroll, and the word 'grad' - I coloured the letters with Copic markers. I also cut the die cut pieces in black card, which I used to give dimension to the pieces. I stamped a sentiment directly onto the background panel and adhered the die cuts. Inside, I cut a black mat layer, and on the white panel stamped a greeting along with 'class of 2023' and another mortar board.


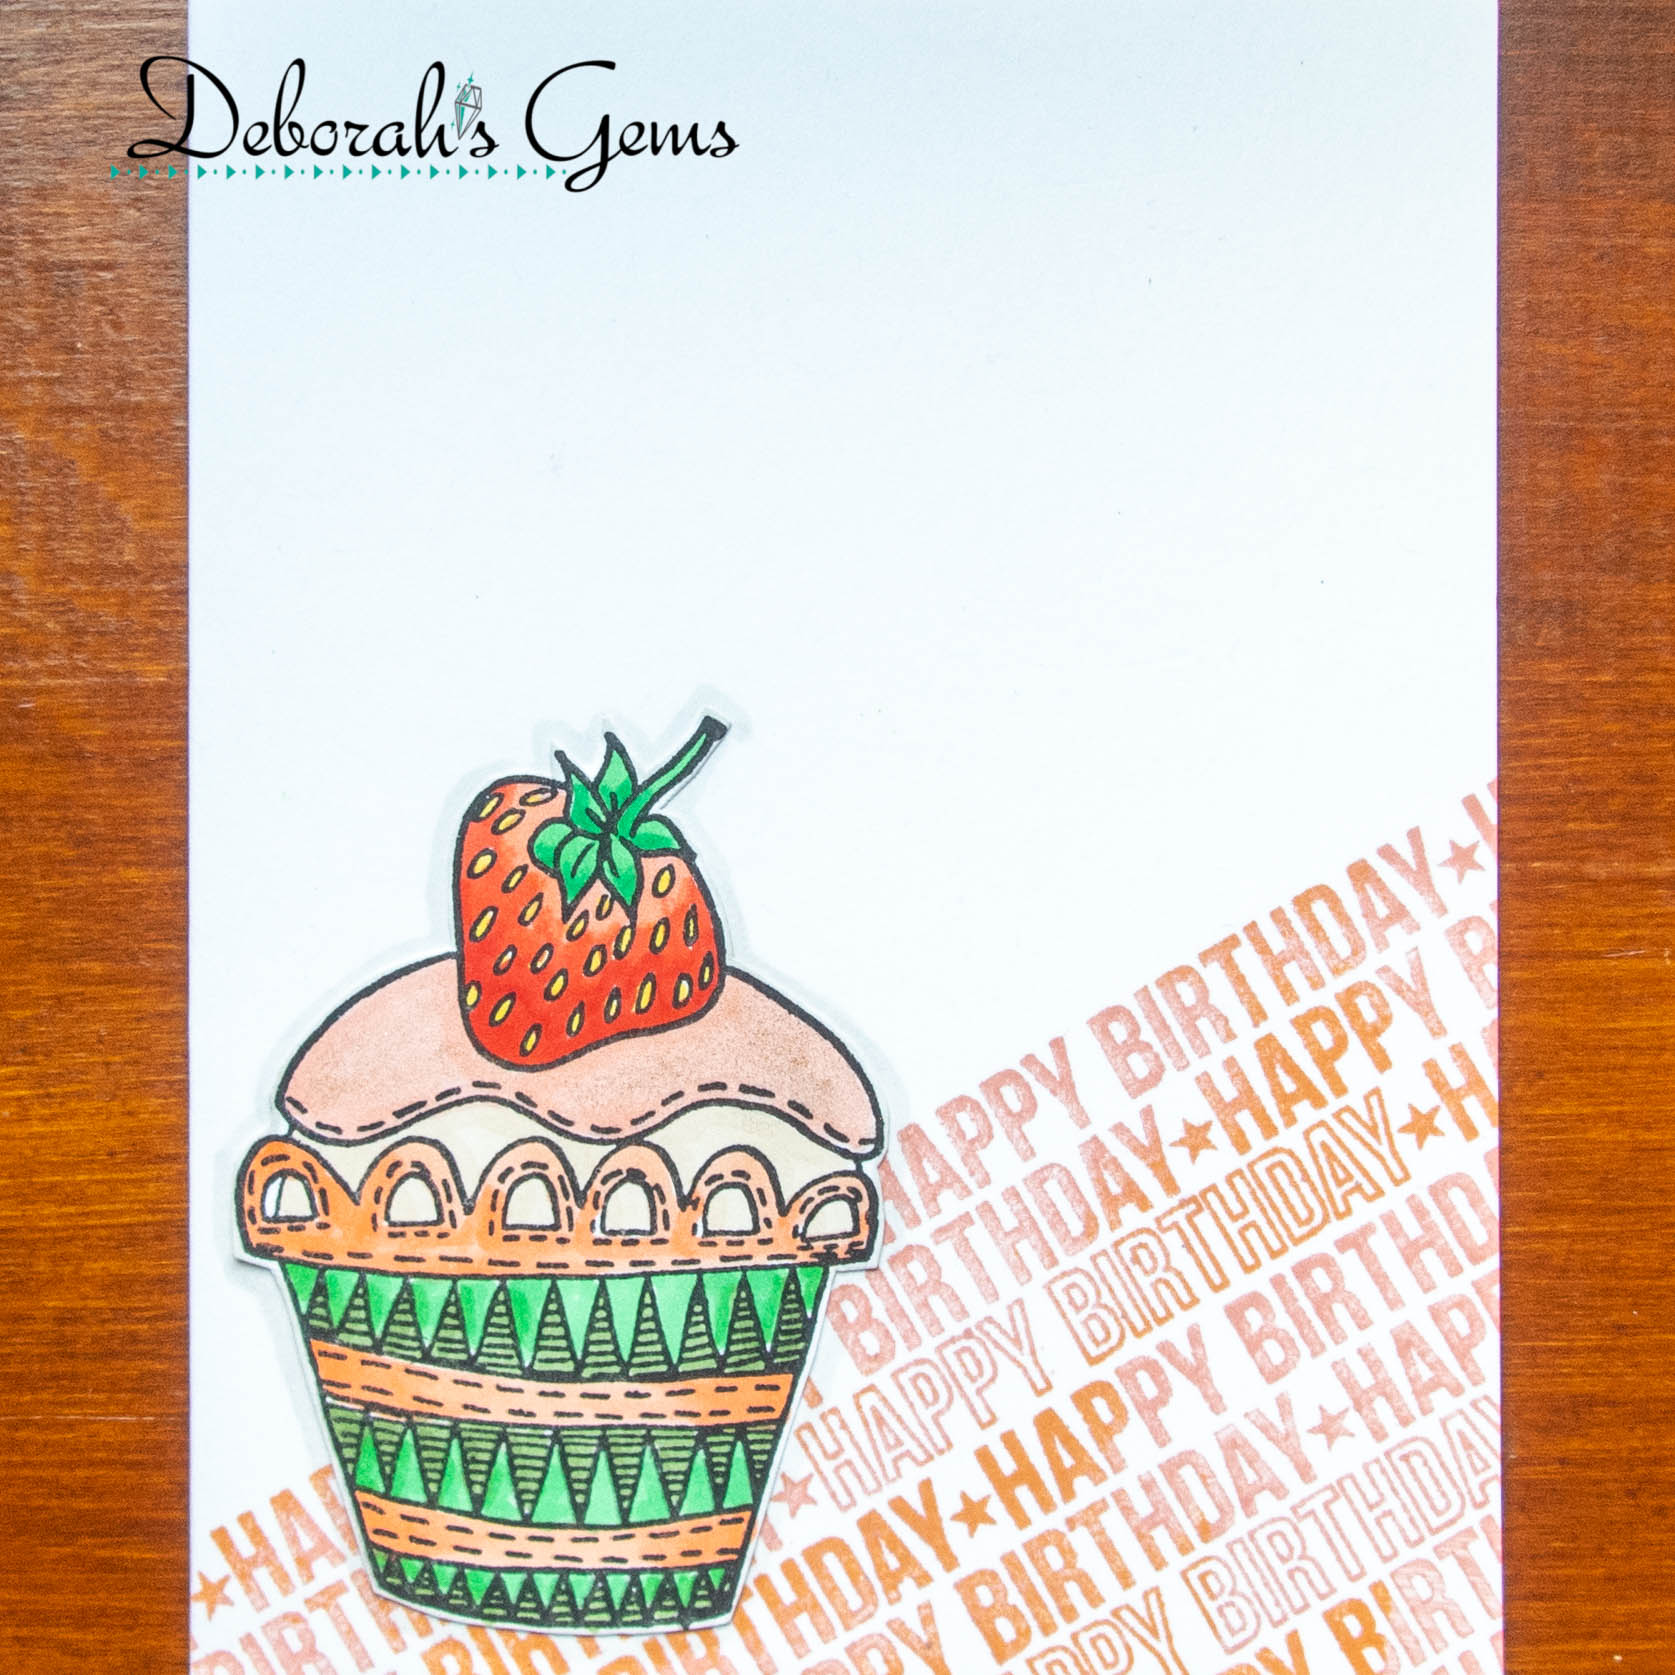
Next is the card that I made for my mum to give to Kat:


Stamps: Dare 2B Artzy - Graduation; Gina K - Hats Off
Inks: Gina K - Lipstick, Tangerine Tango, Wild Dandelion, Lucky Clover, Turquoise Sea, Wild Wisteria, Passionate Pink; Versafine - Onyx Black
Dies: Gina K - MLO2
Accessories: White & Black Card; Gina K Stencil - Fizzy; Clear Embossing Powder


I placed the stencil onto a US A2 card and blended a rainbow of inks across in a diagonal. I die cut a piece of white card onto which I stamped a number of images to make the greeting, this was embossed with clear powder and layered onto a black mat and added to the card. Inside, I cut a black mat layer and on the white panel stamped a bold greeting and a bright pink mortar board.


That's all for now. I'll share some photos from the graduation later on. Take care.

signature photo Signature.png

Diamond Wedding Anniversary

... Hello!! It's been quite sometime since I last posted on my blog. I've not been making many cards, instead I've been working in my art journals (will share some of them later). However, this week we have two big family celebrations. The second one is my in-laws 60th wedding anniversary - that's a heck of an achievement. We'll be getting together for a family dinner to celebrate. I've made two cards for them, the first is the one from Jonathan and me:


Stamps: Stampin' Up! - Number of Years; Lil' Inkers - It's Today, Right?
Inks: Delicata - Silvery Shimmer; Versafine Clair - Morning Mist
Dies: SU - Large Number Framelits
Accessories: White Card; Tim Holtz Alcohol Card - Silver Sparkle; TH Stencil - Sparkle THS132; Su Design Paper - Granite Grey

I'm submitting this card to CAS Colours & Sketches - CASC&S#516 - I've flipped the sketch, and to Happy Little Stampers Anything Goes with Dies - HLSAGD#07.


This came together so quickly. I placed the stencil onto the card and brushed on silver shimmer ink (sadly you can't see the shimmer in the photo, but it's pretty!). I trimmed a piece of the silver card to size and adhered it across the card. I die cut the numbers from silver card, and several from white card too. I layered the numbers together to give dimension and adhered them to the card. I finished by adding a simply greeting in grey ink. Inside the card, I cut a piece of design paper slightly smaller than the note card, and on the white card I added a greeting and cute couple. This card measure 6" x 4½".


Next is the card I made for my mum to give to Madeline and Simon, it's also a 6" x 4½" card:


Stamps: Lil' Inkers - It's Today, Right?; Avery Elle - Sentimental Too; Mama Elephant - Easy Sentiments
Inks: Delicata - Silvery Shimmer; Versafine Clair - Morning Mist
Dies: SU - Large Number Framelits
Accessories: White Card; SU DP - Granite Grey; TH Alcohol Card - Silver Sparkle; Gina K Stencil - Harvest Flourish; Taylored Expressions - 6 x 6 Masking Stencil - Oval


I placed patterned stencil onto the card and added the oval mask stencil over the top. Then I inked with silvery shimmer ink. I die cut the number from silver and white card, layered them together and adhered them into the oval. I finished the front by adding a bold, simple greeting. Inside the card, I cut some design paper for the mat layer, and on the white panel I created the greeting from two different stamp sets. I like doing this. 


That's all for now. See you soon.

signature photo Signature.png

Friday, 5 May 2023

Big Birthday Wishes

... Morning! I mentioned in my last post that April was a busy month for birthdays in the family. Well, it continues into May!! Today is my brother-in-law's birthday, and this is the card I made for Tim:


Stamps: Altenew - Just a Number
Inks: Gina K - Wild Dandelion, Lucky Clover, Light Lilac, Turquoise Sea, Tangerine Tango, Red Hot, Light Orchid; Versafine Claire - Nocturne
Dies: MFT - Big Birthday Wishes
Accessories: White & Black Card; Simon Hurley Stencil - Dazzling Diamonds

I'm submitting this card to a few challenges - The Paper Players - PP#638 where there is a tic-tac-toe grid and I used the diagonal 'bright colours, die cut, birthday'; Addicted to Stamps and More - ATSM#445 where the theme is to use stencils and dies; and finally to Happy Little Stampers Birthday Challenge - HLSBC#05 where it's anything goes.


I took part in the Stencilled 2 online card class and finally got round to making some cards. For this card I used two of the layers from Dazzling Diamonds. I used the large diamond added colour, shifted positions, added more colour, and shifted again. Next I used the tiny diamond on top with darker inks and ended up with this lovely pattern. I placed the large die cut in the centre of the panel and cut out the greeting, I trimmed the piece to size and layered the panel onto black card and added it to an A2 notecard. Inside the card, I cut a piece of black card for the mat layer. I added a strip of the pattern paper to the edge of the white panel and stamped a birthday greeting.


And the fun thing about this card is that I have left-over letters with the pretty pattern on them. I'll share that card soon. That's all for now. See you soon.

signature photo Signature.png

Monday, 1 May 2023

For Jonathan

... Morning!! Yesterday, I shared the card I made for mum to give to Jonathan. Today, I'm sharing the card I made for Jonathan. I usually make a camera/photo themed card for him as that's his major hobby, but Jonathan loves music too and I had just the stamp in my stash to use:


Stamps: Gina K - Music to my Soul; Avery Elle - Inside Birthday Greetings
Inks: Memento - Tuxedo Black; Versafine - Onyx Black; Versafine Clair - Nocturne; Gina K - Soft Stone
Dies: Gina K - Music to my Soul
Accessories: White Card; Gina K Stencil - Brick Wall; Copic Markers; Clear Embossing Powder

I'm submitting this card to The Male Room - TMR#173 - used both dies and stencil, and to Seize the Birthday - STB#260 - the anything goes option.


I've had this stamp set and die for quite a while, but this is the first time I've used them for a card. I got them because I knew it would be brilliant for Jonathan's card. I used my MISTI to stamp the guitar image onto white card, removed it and coloured the image with Copic markers. I used teal as Jonathan's favourite colours are greens and teals. I put the coloured image back into the MISTI, stamped with Versafine ink and heat embossed with clear powder. I then astamped a small greeting on the guitar and used the co-ordinating die to cut out the image. I placed the brick wall stencil over the front of a white A2 note card and added light grey ink, using a very light hand, to create a stone wall. I used dimensional pads to adhered the image to the note card. Inside the card, I simply added a fun birthday greeting.


I'm happy to report that Jonathan loved his cards. Jonathan spent his birthday having a photoshoot here at home in his studio. Today, we are having a quiet, relaxed day. See you soon.

signature photo Signature.png

Sunday, 30 April 2023

Family Birthday Cards

...  Good morning! April is a busy month for birthdays in our family. And today is especially busy. My husband, Jonathan, and his sister, Charlotte, both have their birthdays on 30th April - only Charlotte's 7 years younger!! So, I've been busy making cards, and using some new stash. Here's the card I made for Charlotte:


Stamps: Gina K - Sweet Sentiments; MFT - Inside & Outside Birthday Greetings
Inks: Gina K - Med Lilac, Sea Glass, Sweetcorn, Key Lime, Bubblegum Pink, Light Orchid, Jelly Bean Green; Versafine Clair - Nocturne
Dies: Gina K - Master Layout 2
Accessories: White & Black Card; Gina K Stencil - Layered Peony 

I'm submitting this card to Addicted to Stamps and More - ATSM#444 where the theme is Any Occasion, and to Never-Before-Used-Schtuff - NBUS#49 - this is the first time I've used the stencils and stamps.


I thought Charlotte's birthday card would be the perfect time to use the layered peony stencils. I love rainbows and was totally inspired by Mindy Eggen's beautiful rainbow cards. I stencilled the peony onto a piece of white card and used a stitch-edge die to cut out the panel. I added a simple greeting to one side and then layered the piece onto black card and added the whole panel to the front of a white A2 note card. Inside, I cut a piece of black card for the mat layer. On the white panel I lightly stencilled the peony again - using only layer 1 of the stencils and using a very light hand. I finished by adding a simple birthday greeting.


Hopefully, Charlotte will have received this card by now - but I'm not sure I got it in the post on time!! Heyho!! The next card is the one I made for my mum to give to Jonathan:


Stamps: Altenew - Just a Number
Inks: Gina K - Wild Dandelion, Key Lime, Turquoise Sea, Blue Raspberry, Sweet Mango, Lipstick
Dies: Gina K - Master Layout 1; Altenew - Just a Number
Accessories: White & Black Card; Gina K Stencil - Making Waves; Simon Hurley Stencil - Candles

I'm submitting this card to The Male Room - TMR#173 where the challenge is to use stencil and/or dies - done. I'm also playing along with Seize the Birthday - STB#260 - the Anything Goes part of the challenge.


I took part in Stenciled 2 - on the Online Card Classes  - recently, and this is the first time I've tried out any of the techniques. I first stencilled the candles from yellow to blue to create an ombre colour. Leaving the candle stencil in place, I added the Making Waves stencil on top and, using the same colours, I added more colour on top. I love the subtle pattern this creates in the candles. I used layer 2 of the candles stencil to add the candle flames blending orange and red ink. I die cut a section of the panel and adhered it to a black mat layer and then onto an A2 note card. On a scrap of white card, I blended the same colours and then used a 'happy birthday' die to cut out the words and layered them onto black shadow layers and glued to the card. Inside, I cut a mat layer of black card. On the white card I added a fun sentiment and a few candles that I cut out from the piece of card left over from the front.


I think the candles stencil is just super - perfect for everyone! 

That's all from me for now. It's a dull, wet day here in North Wales, so I'm planning on spending the day in my craft room making cards and listening to my Audible book. See you soon.

signature photo Signature.png

Tuesday, 18 April 2023

Birthday Card for my Aunt

.... Good afternoon! I've been busy working on my monthly dyalogs and not making any cards. However, it's my aunt's birthday on Thursday and I had to make a card for her. In August 2020 I made a number of birthday cards using the Spotlight Sentiments stamp set - a good set for basic cards. I found one of the cards in my stash and dressed it up a bit. Here's the card:


Stamps: Dylusions - Eat Me; MFT - Spotlight Sentiments; Gina K - Hexagon Fun, On the Inside
Inks: Kaleidacolor - Desert Heat; Versafine Clair - Nocturne
Accessories: White Card; Copic Markers; Nuvo - Midas Aquashimmer Brush

I'm submitting this to Addicted to Stamps and More! - ATSM#443 where the theme is birthdays, and to Happy Little Stampers Birthday Challenge - HLSBC#04 where it's anything goes.


This was so easy to make as the note card had already been stamped and I got the cupcake image from my stash of Dylusions images that I have already cut out for use. I coloured the cupcake with Copic markers to match the stamped background. I added some shimmer to the frosting with a gold tone aquashimmer brush. On the inside of the card I added a birthday greeting a row of tiny cupcakes.


That's all from me today - hopefully, I'll be posting again soon. 

signature photo Signature.png
Related Posts Plugin for WordPress, Blogger...