Friday, 30 September 2022

SHC - Simply Celebrate Fall

... Good morning. I'm beginning to get back into my normal routine. I'm here with my Seven Hills Craft blog post. I don't normally do cute, but I do like Lawn Fawn's Simply Celebrate range of stamps, and I treated myself to the new Simply Celebrate Fall, matching dies and the Simply Fall Sentiments recently. I challenged myself to use these sets as the main stamps for my cards. I started by stamping all the images from Celebrate Fall, colouring them with Copics and cutting them out with the matching dies. So here's my first card:


Stamps: Lawn Fawn - Simply Celebrate Fall, Simply Fall Sentiments
Inks: Gina K - Sweet Mango, Passionate Pink, Wild Lilac, Blue Denim, In the Navy, Black Onyx; Versamark; Versafine Clair - Nocturne
Dies: Simply Celebrate Fall; Gina K - Master Layout 2
Accessories: White Card; SU Card - Glorious Grape; Wow - Superfine White Embossing Powder; Finetec - Pearlescent Colours; Copic Markers; Nuvo - Clear Aqua Shimmer Brush

I'm submitting this card to Addicted to Stamps and More! - ATSM#439 where the challenge is Any Occasion.


I used purple card from my stash to make a side-opening US A2 notecard. I cut a piece of white card onto which I blended several inks to create a night sky and tapped on pearl shimmer paint to make stars. I used a stitch edged die to cut out the panel and layered it onto a white mat layer. I stamped a simple Halloween greeting at the bottom of the panel and adhered a row of cute ghosts across the panel. Inside the card I cut a piece of white card onto which I stamp a fun sentiment along with a couple more cute ghosts.


My next card is much cleaner and simpler:


Stamps: Lawn Fawn - Simply Celebrate Fall, Simply Fall Sentiments
Inks: Versafine Clair - Nocturne
Dies: Simply Celebrate Fall
Accessories: White Card; SU Card - Mango Melody; Copic Markers

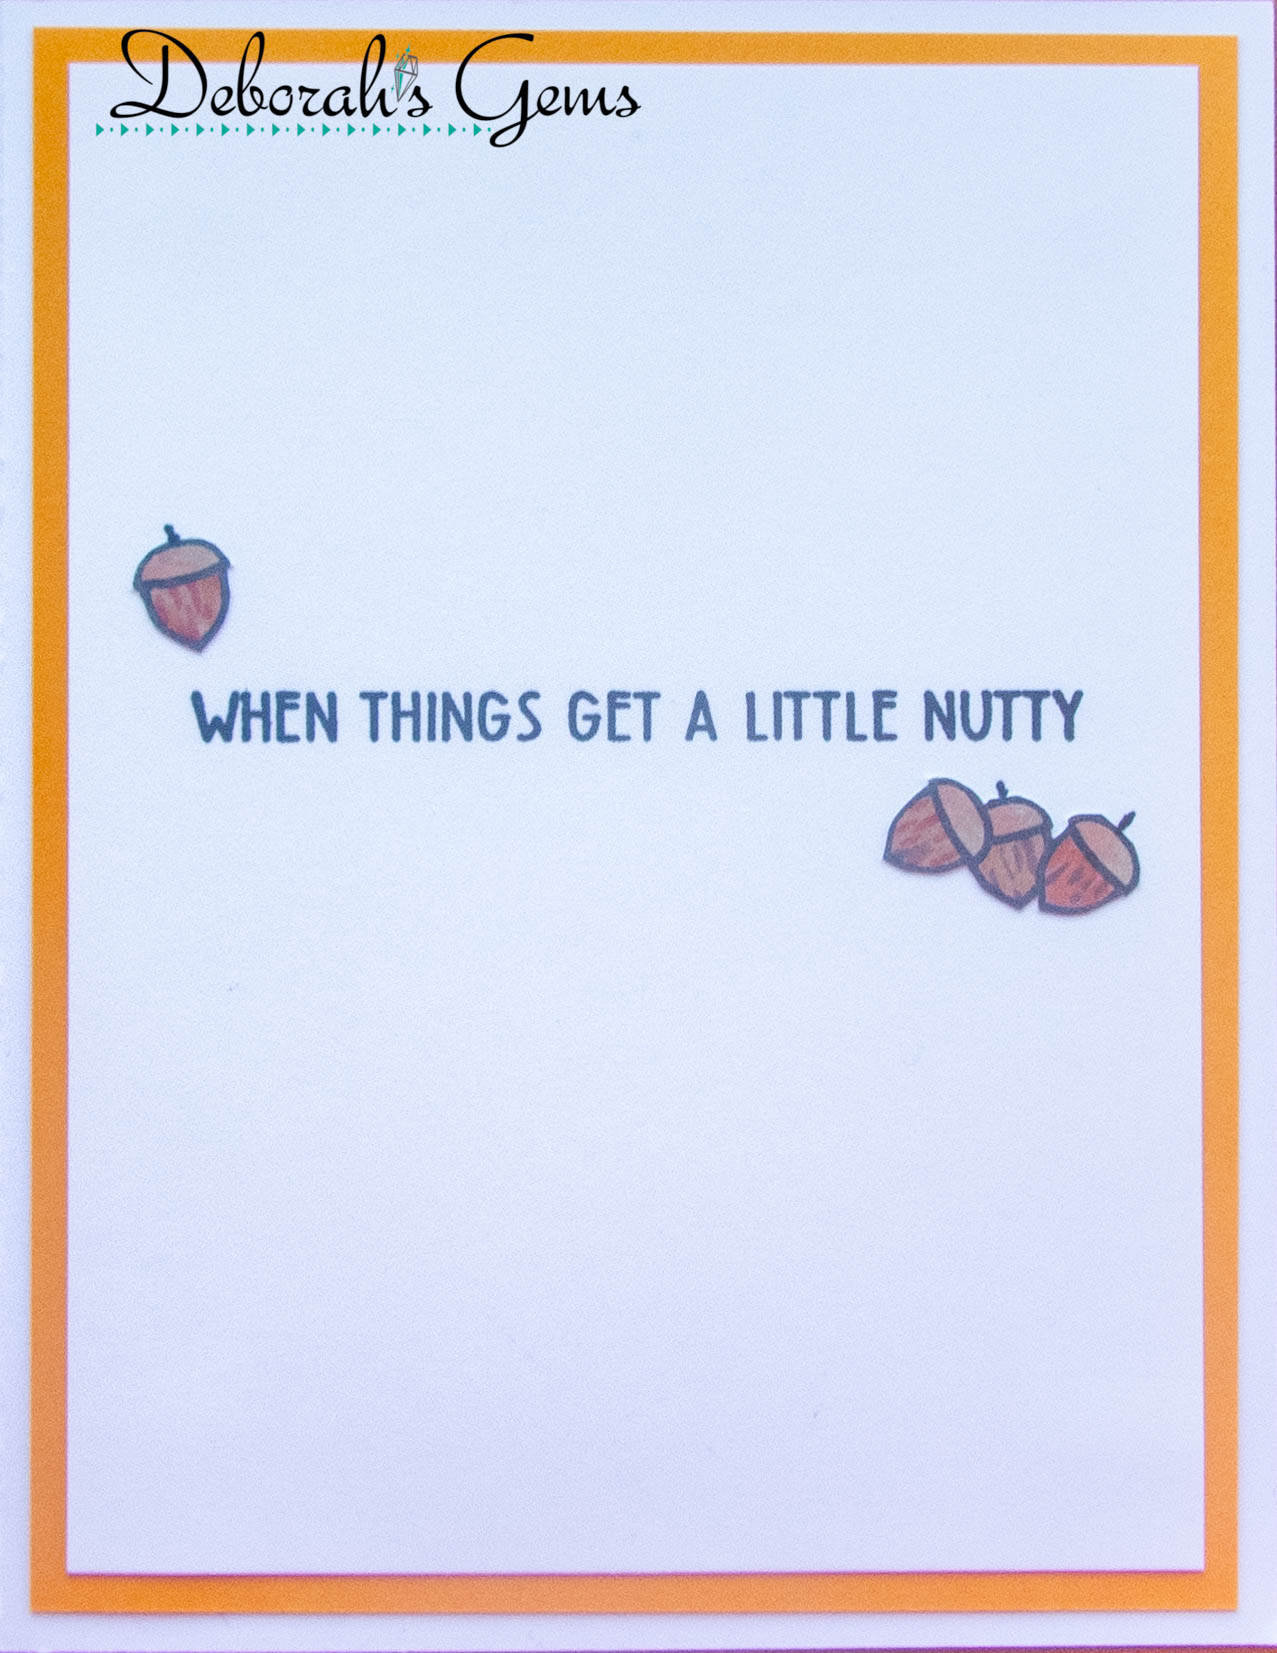
I die cut four rows of acorns in orange card, stacked them together and finished with the coloured row on top. I stamped a bold greeting in black ink towards the top of the card and glued the acorns above. I stamped another row of acorns, coloured them with Copics and fussy cut them out. I stamped several of the acorns tumbling down the front of the card. Inside the card, I cut a mat layer of orange card and on the white panel I stamped a matching sentiment and added a few more acorns.

Next up is an autumn/thanks card:


Stamps: Lawn Fawn - Simply Celebrate Fall, Scripty Autumn Sentiments, Thanks Thanks Thanks
Inks: Versafine Clair - Nocturne
Dies: Simply Celebrate Fall
Accessories: White Card; SU Card - Gumball Green; MFT Design Paper - Cheerful Plaid; Copic Markers; Nuvo - Midas Aqua Shimmer Brush

This time I decided to cover the front of the note card with some green plaid design paper. I stacked the coloured autumn leaves onto four more white leaf diecuts and glued it to the card. I finished the front with a simple, bold greeting. Inside the card, I cut a piece of white card to which I added a strip of the plaid paper. I created the greeting from a couple of other stamp sets and added a single autumn leaf.


Next up is another Halloween card:


Stamps: Lawn Fawn - Simply Celebrate Fall, Costume Party
Inks: Versafine Clair - Nocturne
Dies: Simply Celebrate Fall; Gina K - Master Layout 2
Accessories: White Card; SU Card - Mango Melody; MFT Design Paper - Rainbow Plaid; Copic Markers; Nuvo - Midas Aqua Shimmer Brush

I'm submitting this card to Love to Craft Challenge Blog - LTCCB#70 where the theme is always Anything Goes.


I made the note card from orange card to match the candy corn image. I covered the front with a piece of rainbow plaid. I used a smaller stitch edge die to cut a piece of white card which I layered onto a black mat layer. I stamped a fun greeting in black and used dimensional pads to adhere the row of candy corn. I added a touch of sparkle with a gold tinted aqua shimmer brush. Inside the card, I cut a piece of white card and added a piece of the rainbow plaid paper to the edge. I finished the inside with a simple greeting and tiny candy corn.


Next is another Halloween card:


Stamps: Lawn Fawn - Simply Celebrate Fall, Costume Party; Simply Fall Sentiments
Inks: Gina K - Sweet Mango, Passionate Pink, Wild Lilac, Blue Denim, In the Navy; Versamark; Versafine Clair - Nocturne
Dies: Simply Celebrate Fall; Gina K - Master Layout 1; LF - Costume Party
Accessories: White Card; SU Card - Glorious Grape; Wow - Superfine White Embossing Powder; Finetec - Pearlescent Colours; Copic Markers; Nuvo - Clear Aqua Shimmer Brush

I'm submitting this card to Never-Before-Used-Schtuff - NBUS#42 - all new stuff!!


I blended several inks to create the background - I made it more of a sunset background this time. I used pearlescent paints to add the 'stars'. I die cut the panel and layered it onto a white mat layer. I stamped the Halloween greeting at the top of the card. I stamped the cut kids and extra bits on white card, coloured them with Copics and cut them out with the matching dies. I adhered the kids and bits to the card, added the row of stacked pumpkins and finished the front with a touch of sparkle to the pumpkins. Inside the card, I cut a piece of white card onto which I stamped a sentiment and added a few candy decorations.


My final card is quite clean and simple:


Stamps: Lawn Fawn - Simply Celebrate Fall, Simply Fall Sentiments; Concord & 9th - Apple Orchard Turnabout
Inks: Versafine Clair - Nocturne
Dies: Simply Celebrate Fall; C&9 - Apple Orchard
Accessories: White Card; SU Card - Gumball Green; Copic Markers; C&9 - Enamel Seeds; Nuvo - Midas Aqua Shimmer Brush

I decided to get out my Apple Orchard stamps and die for this card. I die cut a large apple from orange card, lightly added red ink to the edge of the apple. I added the die cut stalk, leaf and apple, stamped a bold greeting and finished with enamel seeds. I added the row of colour apples to the bottom of the note card. I added gold tinted sparkle to these apples. Inside the card, I cut a piece of white card onto which I stamped a message. I also added a number of cute apples onto which I'd stamped faces. 


Wow, that turned out to be a very long post. Thanks so much for sticking with me to the end. I had so much fun making these cards. The Halloween ones are for Kat, her friend Rachel, and Ben. The rest are for my stash - although I think I know where they'll end up!!

The weather around here has turned very autumnal - so much so that I've had to get out my winter sweaters!! Take care, keep safe and warm. See you again soon.

signature photo Signature.png

Friday, 23 September 2022

SHC - Autumn Thanks

.... Hello! It's been a long while since I posted on my blog. Here's my post for Seven Hill Craft blog. I'm here today with a large thank you card - with an autumnal feel. 


Stamps: Concord & 9th - Apple Orchard Turnabout Stamp Set
Inks: Gina K - Wild Dandelion, Dusty Rose, Key Lim, Wild Lilac, Sweet Mango, Lucky Clover, Blue Lagoon, Powder Blue, Honey Mustard, Red Hot, Fresh Asparagus, Blue Denim, Passionate Pink, Peach Bellini, Christmas Pine, Lovely Lavender; Versafine - Onyx Black
Dies: C&9 - Apple Orchard Dies
Accessories: White & Black Card; Vellum; Clear Embossing Powder; Concord & 9th - Autumn Hues Stencil Set

I think you know that I'm a big fan of Concord & 9th products. I used the Autumn Hues stencil set as the main feature on this card. The stencil pack has two stencils - which both work in the same way as the turnabout stamps - one creates a full background and the other a wreath image. What is lots of fun is how you can use lots of different coloured inks to create the main image - and that's exactly what I did! The main panel is 6" square, layered onto a 6½" black mat layer and then added to the front of an 8" square white card. I stamped the greeting in black ink onto vellum, heat set it with clear embossing powder and used the apple die to cut it out. I adhered it directly to the card front. You can just about see the vellum apple in the image above!! Inside the card, I cut a mat layer of black card and on the white panel I used the wreath stencil and added a greeting inside.


I had so much fun making this card. Actually it's good to get back to making cards and doing my mixed media art work too. 

I'm submitting this card to Never-Before-Used-Schtuff - NBUS#42 - first time using any of these products. And also to Happy Little Stampers Stencil Challenge - HLSSC#09 where it's anything goes.


That's the end of the post about my card.

I completed my chemotherapy at the beginning of August. This was followed by radiotherapy for 5 days (so glad it was only 5 days) which ended at the beginning of September. I've been feeling so, so tired for the past few months, and it's only in the last few days that I've really started to feel more like myself. I still have days when I just want to stay in bed and sleep, but mostly it's all good now. Before I go, I want to remind you all to make sure you check your breasts regularly. Take care of yourselves.

signature photo Signature.png

Friday, 29 July 2022

SHC - Christmas in July Continued

... Morning! I'm here with my Seven Hills Craft blog post and I'm continuing with my Christmas in July kick. However, this week's card has a much cleaner, simpler look than last week's card.


Stamps: Colorado Craft Company - Holiday Wishes, Big & Bold Nordic Snowflakes
Inks: Gina K - Powder Blue, Sea Glass, Ocean Mist; Versafine Clair - Nocturne
Accessories: White Card; Gina K Card - Sea Glass; Lawn Fawn Stencils - Lots of Stars Background Layering Stencils

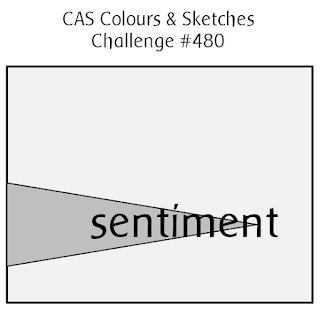
I'm submitting this to a couple of challenges. The layout is based on the sketch from the current challenge at CAS Colours & Sketches - CASC&S#480. I'm also playing along with Perfectly CAS - PCAS#29 where the theme is Festive and to use a third or less of the card front.


This was so quick and easy to make. I simply masked off a triangle on the side of a note card and then used the layering stencils to fill the area with pale blue and light aqua stars, keeping them slightly darker at the edge of the card and fading to the point of the triangle. I finished the front by adding a simple, elegant greeting. Inside the card, I cut a mat layer of pale aqua card and on the white panel I stamped a lovely greeting and added a trio of pretty snowflakes.


This was fun to make and so, so easy. I love the stars layering stencils and plan to use them again on a few more Christmas cards. That's it from me today. See you all again soon.

signature photo Signature.png

Thursday, 28 July 2022

Cat Card

.... Morning! Last month my son asked me to make a birthday card for a friend of his. She likes red, cats and would be celebrating her 31st birthday - but I had to put 29Bth - an in joke between them. So, this is the card I made and Ben was delighted with it:


Stamps: Dylusions - Cat Among the Pigeons, Numberology; Lawn Fawn - Milo's ABSc
Inks: Stamping Up! - Poppy Parade
Dies: Gina K - Happy Birthday Trio, Master Layouts 1
Accessories: White & Black Card; SU Card - Poppy Parade; Gina K Stencil - Fizzy; Nuvo - Clear Aqua Shimmer Brush; Gina K - Masking Magic

I'm submitting this card to a few challenges:

I started by cutting an oval mask from Masking Magic and placed that in the centre of a piece of white card that I cut out with the smaller of the two rectangles in ML1. I placed the stencil over the top and used a bright red ink going lightly at the edges and corners and getting darker around the masked oval. I stamped the large cat before removing the oval mask. I matted the inked panel on black card and then stamped the required number and added two more smaller cats. I stamped them on scrap white card and fussy cut them out. I adhered the panel to the front of a red card and finished the front by adding a die cut birthday greeting in black card. I also added some sparkle to the words with a clear aqua shimmer brush. Inside the card, I cut a mat layer of black card. On the white panel I simply added a light stencil of fizzy dots and another cute cat, and left a large blank space for Ben's message.


That's all from me today. Hope everyone is keeping well. I'd also like to thank everyone for your comments - they are all much appreciated.

signature photo Signature.png

Friday, 22 July 2022

SHC - Christmas in July

... Morning! I'm running a bit late with my post for Seven Hills craft this week. It's been a bit of week here. However, I managed to find a bit of time this morning and made this quick and easy Christmas card:


Stamps: Colorado Craft Company - Savvy Sentiments Merry Everything, Big & Bold Slimline Nordic Snowflakes
Inks: Versamark; Gina K - Sea Glass, Powder Blue, Wild Wisteria
Accessories: White Card; Silver and Clear Embossing Powder

I'm submitting this to Never-Before-Used-Schtuff - NBUS#40 - the stamps are all new to me this month.

This card is super easy to make. It's a mini-slimline card measuring 6¼" x 3¼". I stamped the greeting in Versamark ink and heat embossed with silver powder. Then I arranged the lovely snowflakes along the top edge of the card, stamped them with Versmark and heat embossed with clear powder. I then blended soft aqua, pale blue, and lilac inks to reveal the snowflakes. I love this technique - it's so pretty. I haven't, as yet, decorated the inside, but I'll do that before I send the card out.

That's all from me today. Thanks for dropping by and for leaving your comments, they are very much appreciated.

signature photo Signature.png

Friday, 15 July 2022

SHC - Floral Calendar

.... Good morning. I'm here with my Seven Hills Craft blog post. I don't have a card this week. Instead, I decorated my July Calendar page. I used two new sets from Altenew and it was such fun. Here's the page:


Stamps: Altenew - Calming Cluster, Enjoy Life
Inks: Gina K - Lemon Drop, Wild Dandelion, Innocent Pink, Bubblegum Pink, Passionate Pink, Tangerine Twist, Tomato Soup, Key Lime, Grass Green, Lucky Clover, Black Onyx; Versafine Clair - Nocturne
Accessories: Calendar Blank; Altenew Stencils - Calming Cluster, Enjoy Life

I'm submitting this to Love to Craft Challenge Blog - LTCCB#69 where it's always anything goes.


I started by stamping the large outline image from Calming Cluster onto the calendar and then used the matching layering stencils to add colour to the image. I should have dried the black outline before using the stencils, but never mind, the outline only smudged a little!! The stencils are very easy to line up with the stamped outline it didn't take long to colour the whole image. I had some space left to the side, so I added the lilies from Enjoy Life, and again used the matching layering stencils to add colour. I finished by adding some words - the Today quote is from Enjoy Life, and the '.. relax and unwind' quote is from Calming Clusters.

As well as co-ordinating stencils, there are dies to match both sets, and there's also a 3D embossing folder to go with Calming Clusters. I shall be using these stamp sets and matching accessories again soo to make some cards.

That's all for now. See you again soon.

signature photo Signature.png

Friday, 1 July 2022

SHC - Birthday Rose

.... Good morning. It's time for my weekly Seven Hills Craft blog post. I can hardly believe we've reached July already - the year is flying by. Today is my mother-in-law's 80th birthday and I made this card for her:


Stamps: Concord & 9th - Painted Rose, Laurel Frame
Inks: Gina K - Sweet Mango, Red Velvet, Key Lime, Lucky Clover, Soft Stone; Versafine Clair - Nocturne
Accessories: White & Black Card; C&9 - Confetti Dots Turnabout Stencil

I'm submitting this card to Less is More - LIM#467 where the team want us to make a one-layer card with only one image (and words) - done! I'm also playing along with Seize the Birthday - STB#241 where I'm playing with the Anything Goes birthday option.


I used an A6 notecard (measuring 6¼" × 4½") as the rose is a large image. I stamped the outline rose in black and then masked it off. I used the Confetti Dots Turnabout stencil to add some subtle pattern to the card in red and orange inks. I didn't use the stencil as a turnabout, just as a simple stencil. I removed the mask and used the two-step solid stamps to add colour to the rose - orange for the main part of the rose and red for the detail. The leaves are also two-step stamped images. I finished the front by adding a simple birthday greeting in black. Inside the card, I cut a mat layer of black card and on the white panel I stamped the large rose again in soft grey ink. I finished by added a greeting in black.


My mother-in-law is a very keen gardener, and she loves roses, so this card was a pleasure to make for her. That's all from me today. See you again soon.

signature photo Signature.png

Friday, 17 June 2022

SHC - Sunny Days Ahead

.... Morning! It's time for my weekly Seven Hills Craft blog post. Today I've another encouragement card to share with you - I need a lot of these right now. 


Stamps: Concord & 9th - Painted Shapes, Bold Butterflies, Rain or Shine, Good Vibes Turnabout
Inks: Memento - Angel Pink, Rose Bud, Rhubarb Stalk; Versafine Clair - Nocturne
Dies: C&9 - Positively Stitched Card Front Die
Accessories: White Card; SU Card - Rich Razzleberry

I'm submitting this card to Happy Little Stampers Anything Goes with Dies - HLSAGD#06, also to Addicted to Stamps and More! - ATSM#431, and finally to Never-Before-Used-Schtuff - NBUS#39 - it's the first time I've used the stitched die plate.


I started by cutting a piece of white card to 5½" × 4¼". I placed the panel in my MISTI and stamped some fun shapes in shades of pink ink. I then added a few extra flower stamps, along with some positive symbols in darker pink. I stamped a greeting, in a fun font, in black in the centre of the panel. To add some more interest to the piece, I used the Positively Stitched card front die to cut lots of little stitched pluses over the front. I trimmed the panel down to 5⅛" × 3⅞" and layered it onto a piece of dark pink card and adhered it to the front of an A2 side-opening notecard. Inside, I cut a mat layer of dark pink card. On the white panel I added a simple greeting and then decorated the inside to match the front of the card.


I think this card will be going to my mum. She's recovering well from the radiotherapy, but still tries to push herself a bit to hard. 

Yesterday was a glorious day here in North Wales, so Jonathan took the day off work and took us all to Bodnant Gardens. It was just fabulous. I pushed my around - but she got up and walked about too - and when we went into the rose garden, the fragrance was just so beautiful. We didn't manage to walk far, but it was a lovely morning. Here are a couple of photos from our walk:


That's all from me today. See you again soon.

signature photo Signature.png


Related Posts Plugin for WordPress, Blogger...