Showing posts with label WMS - You're A Doll. Show all posts

Sunday, 20 December 2015

Happy Birthday .....

... Good morning!  It's a lovely, but rather cold, morning in Northville.  All the snow that fell on Friday night has melted away and we're going to be warmer in the next few days.  It does feel weird not to have snow on the ground!  Anyway, enough of that!

I'm here with a birthday card to show you - makes a change from the Christmas and Creepmas card that I've been making lately.

Happy Birthday - photo by Deborah Frings - Deborah's Gems

Stamps: Waltzingmouse - You're a Doll, Folk Art Labels #25; Stampers Anonymous Tim Holtz - Crazy Talk
Inks: Versafine - Onyx Black; Memento - Tuxedo Black; Stampin' Up! - Real Red
Dies: Waltzingmouse - You're a Doll
Accessories: White Lustre Card; SU Card - Crumb Cake; SUDP - Lucky Limeade; Copic Markers; Wink of Stella - Clear; Cuttlebug EF - Diamonds in the Rough


 I've combined a number of challenges in this card:

I cut a panel of kraft card, added a strip of dotty design paper and embossed it with an uneven pattern to give texture in some areas and not in others.  I stamped the Russian Doll on white card, coloured her with Copics and cut her out with the matching die.  I cut a number of extra dolls, glued them together, finishing with the coloured image on top.  I added lots of sparkle to the image with a clear Wink of Stella brush.  I used my MISTI to position and stamp the sentiment.  And finished the front of the card with a little folksy flower.  On the inside I cut a mat layer of kraft card and on the white panel stamped a tiny Russian Doll, some flowers and a greeting.

Happy Birthday inside - photo by Deborah Frings - Deborah's GemsHappy Birthday sq - photo by Deborah Frings - Deborah's Gems

As the shine is shining I took a close-up of the Russian Doll so that you can see the lovely shimmer that you get from Wink of Stella brushes:

Happy Birthday detail - photo by Deborah Frings - Deborah's Gems

We are all enjoying the start of our Christmas holiday.  Yesterday we went to a photo shoot with the gorgeous Stephanie Smith - there were seven photographers and we had a fabulous time.  I've not edited the photos yet, but here's a sneak peek at one from yesterday:

Stephanie 1 - photo by Deborah Frings - Deborah's Gems


And today, while Jonathan is out at another photo shoot with Stephanie, Kat and I are home chilling! I put the finishing touches to this card and Kat is catching up on some TV.  So nice to know that we don't have to get up early tomorrow and rush around - we can relax!!!  That's all for now, see you again tomorrow!

signature

Saturday, 28 March 2015

52CCT - Technique ....

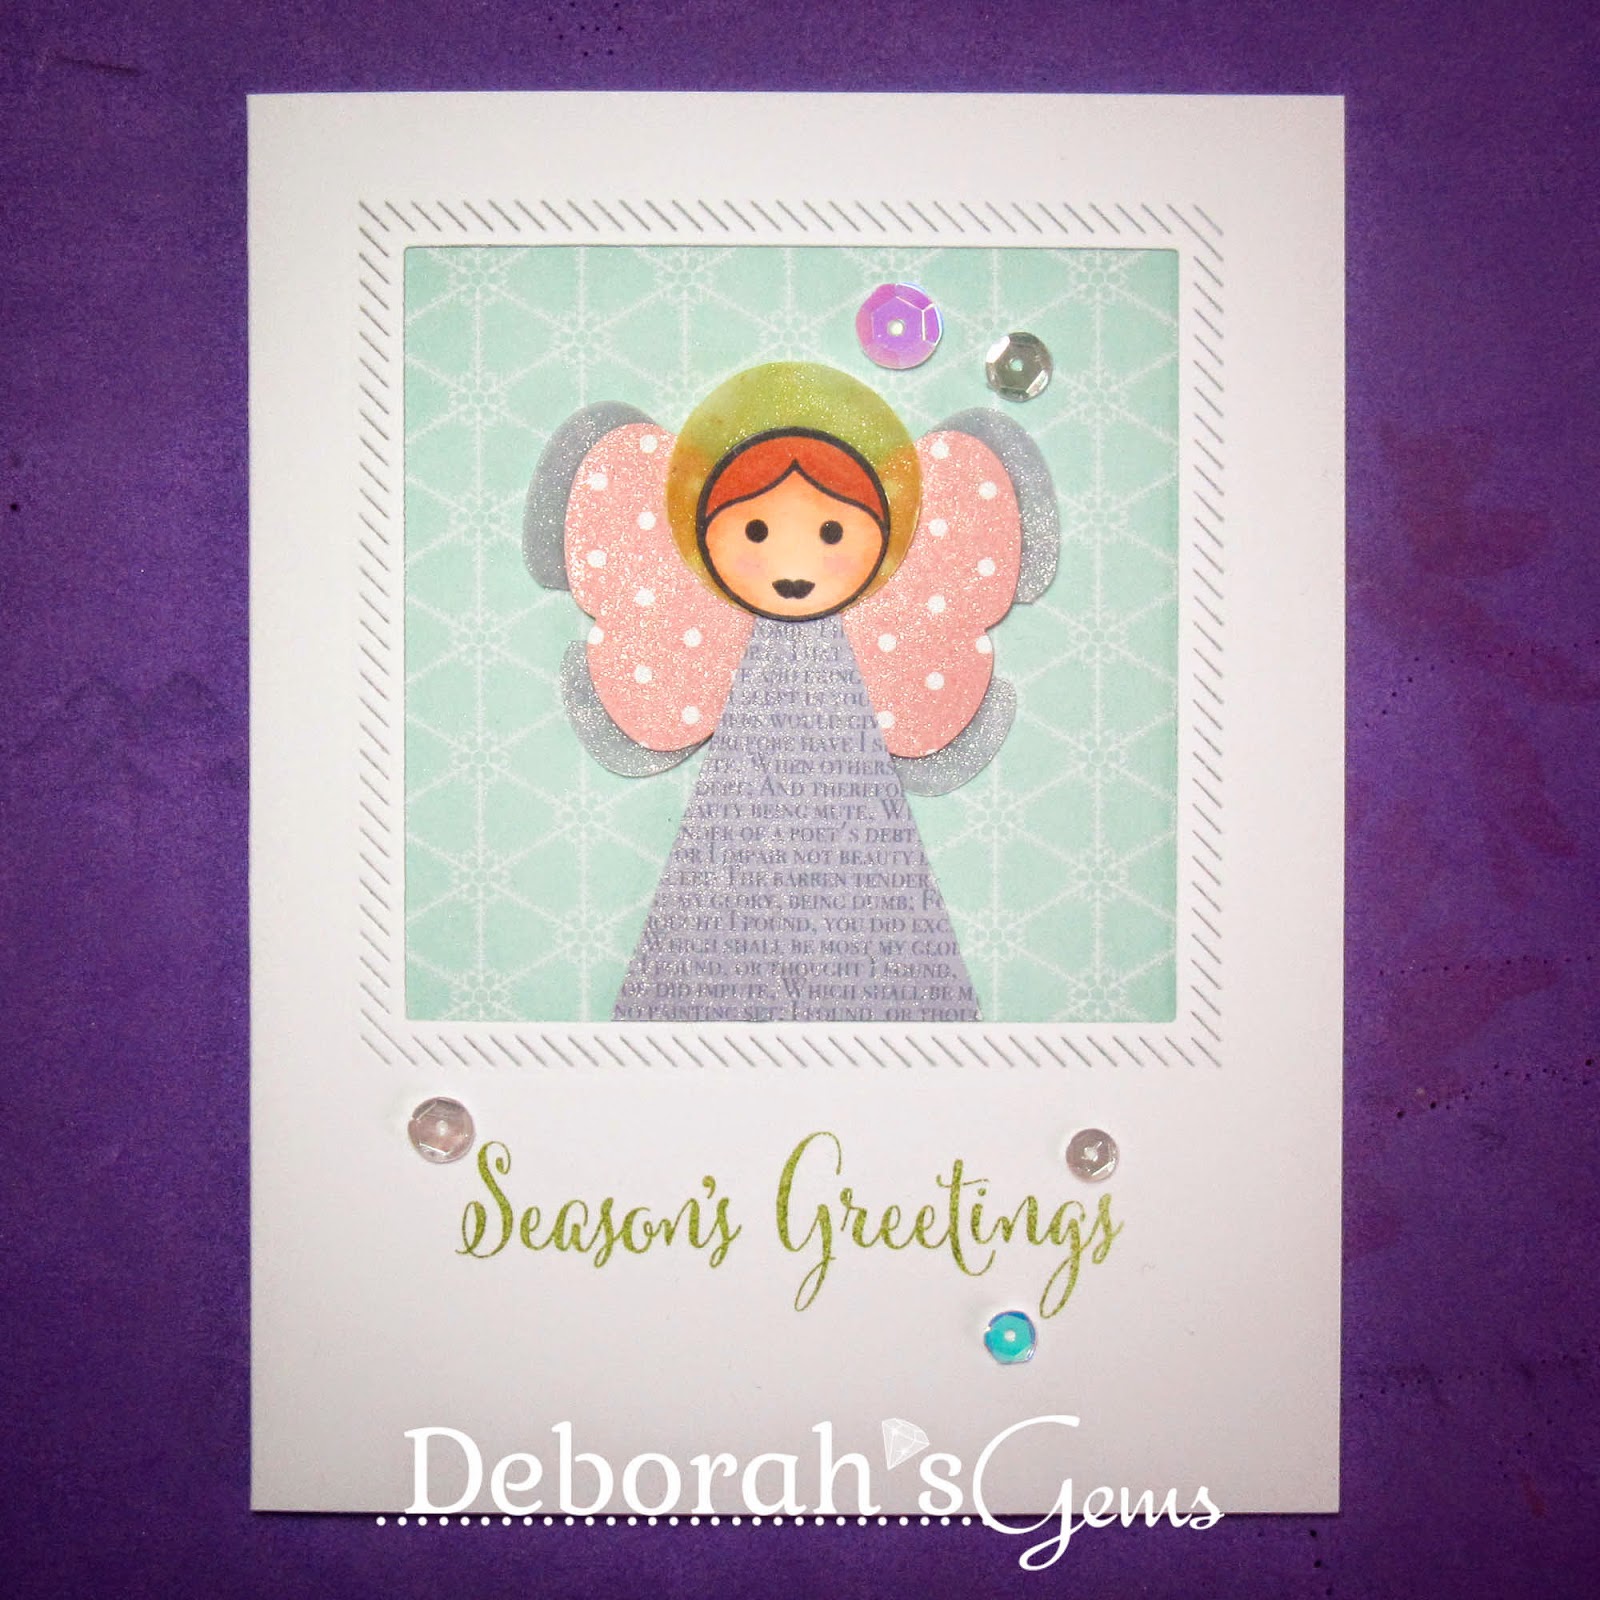
....  Good morning!!  It's time for our last challenge of March - can you believe it's the end of the month already?  This week, at 52 {Christmas} Card Throwdown, Gill would like us to create a Christmas card using our punches.  I have to admit that I've been a bit worried about this challenge - I'm not good at creating with punches.  Fortunately, the Internet is an amazing source of inspiration and this card owes much to Dawn's lovely angel.  Here's my card:

Season's Greetings - photo by Deborah Frings - Deborah's Gems

Stamps: Uniko Studio - Simply Said Christmas; Waltzingmouse - You're A Doll, Opera Tags Christmas
Inks: Stampin' Up! - Old Olive, Wisteria Wonder; Memento - Tuxedo Black
Dies: Die-namics - In & Out Diagonal Squares #3
Accessories: White Lustre Card; SU DP - Winter Frost, Blushing Bride, Wisteria Wonder; Copic Markers; Wink of Stella - Clear, Gold; Vellum; SU Punches - Tree, Butterfly, 1" Circle, ¾" Circle


The layout is based on this week's sketch at CAS(E) this Sketch - CTS#116 and the colours are from Colour Q - cQc#284.  I used a die to cut the square - I like the way this die has the pattern on the inside and outside of the die cut.  I put a piece of design paper on the inside of the card and, as it's double-sided, I have a nice pattern on the inside too.  I used punches to cut the angel's body, face, wings and halo.  I stamped a face on the smaller circle and coloured it with Copic markers.  I added lots of sparkle to the reminder of the angel and then adhered the pieces together.  The halo was made by colouring some vellum with gold Wink of Stella and punching out a circle slightly larger then the angel's head.  I adhered the angel to the card with dimensional gel.  I finished the front with a simple sentiment and some sequins.  On the inside I cut another piece of design paper and on the white panel stamped a bold Christmas greeting.

Season's Greetings inside - photo by Deborah Frings - Deborah's Gems

I've taken a close-up photo of the angel so that you can see all the sparkle and shimmer.
 
Season's Greetings detail - photo by Deborah Frings - Deborah's GemsSeason's Greetings sq - photo by Deborah Frings - Deborah's Gems

For more inspiration using punch art on your Christmas cards, do check out the blog and see what the rest of the team have made for you.

I've got a very quiet, crafty day lined up as Jonathan and Kathryn will be out pretty much the whole day.  In the morning they are off to a photo shoot which Jonathan will enjoy lots!  The rest of the day they'll be at a pop concert.  Jonathan is taking Kathryn to a concert at The Crofoot in Pontiac - featuring one of her favourite bands - Set It Off, along with lots of other bands too.  Jonathan loves his daughter very much indeed :)  That's it for now - see you soon.

signature
Related Posts Plugin for WordPress, Blogger...